The DIY hydroponic system is very popular among growers, because it is possible to grow specific crops in different places according to personal preferences and customize a private “vegetable garden”. Due to the high retail prices of hydroponic systems, more and more growers decide to make their own soilless systems. But judging from the author’s many years of planting experience, many growers did not go smoothly in the process of establishing hydroponic systems, especially when there were many problems in the design. The author likes to design and build a hydroponic system suitable for the site in a designated place, but some mistakes are often made during the construction process, and have to pay a high price for these mistakes. For example, the author once bought some impractical or unusable things, once assembled the cultivation system, but failed because it was not fixed, and once built the cultivation system, it was found that the plants could not receive sufficient light and drainage performance. Bad wait.
Although many mistakes were made and a lot of money was wasted in the process of making these cultivation systems, the author also learned a lot of useful knowledge from it. The hydroponic cultivation system introduced below draws on some of the author’s experience and lessons, and hopes to be helpful to readers and save valuable time and money for readers.
How to choose the right hydroponic culture system
When choosing which hydroponic system to install in the family, growers need to consider many factors, including the choice of crops, the place where the soilless vegetable garden is placed, and daily management capabilities. Of course, construction costs are also very important, and energy consumption, inputs, and other daily maintenance costs need to be considered.
Choose the system according to crop
When choosing a hydroponic system, the first thing to consider is what crops to grow. Some systems can grow multiple crops (such as tidal cultivation systems), while some systems are only suitable for growing crops with specific growth characteristics. The first system introduced in this chapter is the bottle cultivation system.
This system is suitable for growing leafy vegetables such as lettuce and basil, but is not suitable for growing large plants such as tomatoes. Growers should also consider the growth characteristics of cultivated crops. For example, consider planting crops that have less stringent requirements for nutrient requirements and nutrient solution pH. The biggest advantage of this cultivation system is that plants are highly replaceable, and growers can try to plant new crop wells to accumulate experience. Luis provides a lot of planting guidelines in this chapter, recommending some suitable crops, but not limited to these recommended crops. The environment in which many crops grow is not necessarily the best environment for growth. The adaptability of plants to the environment is far beyond our imagination. Novice planters can prepare more seeds to prevent failure.
Choose the system according to the placement location
Among the many hydroponic systems, there is also a hydroponic system that can grow lettuce in space! No matter where you are, you can use the water system to grow plants. There is a hydroponic vegetable garden in Luis’s RV. Luis will suggest suitable places to visit for each cultivation system introduced in this chapter. Some of these systems can be appropriately improved based on indoor, outdoor, and space conditions.
Choose the system according to the maintenance cost of the cultivation system
When estimating maintenance costs, the number of plants and the size of the reservoir are usually the main factors that need to be considered. Generally speaking, when crops are densely planted in a small liquid storage tank, frequent maintenance is required. This is because the roots of the plants continuously absorb water and the water level of the liquid storage tank will gradually drop. The grower needs to replenish the nutrient solution in the storage tank in time.
This kind of system will have nutrient imbalance in the nutrient solution, so the nutrient solution must be replaced frequently. Another factor that affects maintenance needs is the type of crop. Fruiting vegetable crops such as tomatoes, peppers, and cucumbers need to be erected or pruned, while some crops such as sprouts have a short growth cycle and a heavy workload, requiring weekly sowing and harvesting.
Choose a system based on difficulty
For planting novices, it is not impossible to choose to establish an advanced cultivation system from the beginning, but it needs to be reminded that it is still difficult to succeed once. Everything is difficult at the beginning, and it takes a process to successfully build a relatively complex cultivation system. It will be difficult at the beginning, but after a period of learning, it will feel easy. Although the growers’ enthusiasm for learning is very high, they should choose a cultivation system that is simple and easy to operate, low-cost, and has a high success rate in the early stages of learning.
Featured DIY hydroponic system
In the following chapters, Luis will show some of the more popular DIY soilless cultivation systems, attach a detailed construction plan, and tell readers why they choose this cultivation system instead of other cultivation systems. Before deciding which (or multiple) cropping systems to build, Luis recommends that growers read through the advantages and disadvantages of all systems and how easy it is to operate.
Bottle cultivation system
Floating plate cultivation system
Floating plate capillary cultivation system
Nutrient Liquid Film Cultivation System
Barrel cultivation system
Bed cultivation system
Tidal cultivation system
Aerosol cultivation system
Vertical vegetable garden
Bottle cultivation system
Searching for “bottle cultivation system” with Google/Baidu can quickly find a variety of ways to use bottles in the system. But most of these methods are either too complicated, or not aesthetically pleasing, or both exist. In fact, these simple cultivation bottles are simple to make, low-cost, and do not require maintenance, and do not require electricity, so they are a good choice.
Suitable places: indoor, outdoor, or greenhouse
Size: small
Cultivation substrate: rock wool
Do you need a power supply: Not required
Applicable crops: leafy vegetables and herbs (a collective name for spice plants, including lavender, rosemary, thyme, mint, etc.-Luis Note)
Kratky hydroponic method equipped with aeration system
The Kratky method is the simplest hydroponic method. No pumps, no complicated irrigation systems…only plants placed in the water. Early hydroponic research mostly focused on static hydroponic systems similar to the Kratky method. Studies have found that when the nutrient solution in this system is ventilated, plant growth speeds up. This discovery has greatly promoted the development of aeration and circulation cultivation systems (such as nutrient liquid film cultivation systems and barrel cultivation systems).
At present, most hydroponic researches are focused on these circulatory systems, but there are still people engaged in static non-circulating hydroponic experiments. Bernard Kratky of the University of Hawaii is one of the strongest supporters of non-circulating hydroponics. He has done a lot of research work on the further development of non-circulating hydroponic systems. Therefore, his name has become synonymous with the technology, namely the Kratky method.
Crop selection
The Kratky method has been successfully used in many crops, from leafy vegetables such as lettuce to flowering crops such as tomatoes and potatoes. Most hydroponic growers prefer to use the Kratky method to grow leafy vegetables and coriander, because large crops may be blocked due to lack of oxygen at the roots.
The oxygen demand in the root zone of lettuce and other crops is much lower than that of tomatoes and other crops.
For bottle hydroponics, crops that grow in short clusters or always stand upright are preferred to avoid the system from tipping over due to topping. Crops such as basil, kale, Swiss chard, and lettuce are Luis’s favorite bottled plants, but, Luis has also successfully grown parsley, fennel, and eucalyptus in a bottle cultivation system.
The crops can be cultivated in a clean, transparent bottle, but the algae in the bottle need to be removed frequently to keep the bottle clean.
Placement
The Kratky method is suitable for indoor, outdoor, or greenhouse, but it is not suitable for outdoor use in areas with heavy rainfall, because the nutrient solution is easily diluted or washed away by rainwater. The Kratky vegetable garden is very suitable for use in vegetable gardens where no electricity is available.
The location of the bottle hydroponic system is more restricted. For example, if the bottle body is coated with black, it is easy to accumulate too much heat in the root area of the plant. Therefore, for outdoor use, it is recommended to use a light-colored hydroponic bottle and place it in a warm environment. When Luis uses the bottle hydroponic system outdoors, he likes to install a wall-mounted bottle holder on the porch to keep the hydroponic bottle in a semi-shady area, so it looks beautiful. Indoors, bottle hydroponics can be placed almost anywhere, such as kitchen counters, tables, windowsills, and even wall-mounted lights installed in the corridor… The only limiting factor in indoor bottle hydroponics is insufficient light.
How to make a bottled hydroponic vegetable garden
Bottle type hydroponic vegetable garden is the simplest and most basic hydroponic vegetable garden. Luis often set up this hydroponic system with a group of children aged 8-18 when visiting school. There are many ways to make hydroponic bottles of different colors and decorations to create a very personal style of hydroponic vegetable garden. To simplify the system, growers can use opaque bottles to skip the step of spray painting.
Required materials
Broken glass bottle or plastic bottle
Rock wool stopper (suitable for different bottle mouth sizes)
Fertilizer
Optional materials
Scotch tape
Support bamboo pole
Painted blackboard
chalk
Burlap or cloth
Bottle tag
Grow lights
Optional tools
scissors
funnel
Hot melt glue gun
Bottle preparation
Bottle selection is the most critical. The ideal bottle requires a short neck, so that the stopper can easily touch the body. It is best to choose a bottle with a thicker body. Because the water surface of the bottle is relatively wide, it helps the crop roots to fully soak in the camping liquid to absorb nutrients. The following steps are for transparent bottles. If you are using non-transparent bottles, please skip the following steps.
- Tear off the label from the bottle.
- Stick a piece of tape from the mouth of the bottle to the bottom of the bottle. You can tear it off later to create a window where you can observe the root. Fold the end of the tape over the bottom of the bottle so that it can be peeled off after painting.
- Put the bottle upside down on the stake and spray paint, or you can dip the bottle in the paint. In particular, make sure that the coating is thick enough to ensure that the inside of the bottle does not transmit light.
- After the paint is dry, remove the tape.
- It is best to make a scale or mark on the bottle before filling.
The choice of cork
Choose a stopper that fits the mouth of the bottle or choose an open bottle that fits the stopper. You can also cut a rock wool stopper and install it at the mouth of the bottle, but this may cause some damage to the roots of the seedlings.
- The stopper should be large enough to be firmly fixed on the bottle mouth.
- Properly raise more seedlings when raising seedlings, and select well-growing seedlings for use in hydroponic vegetable gardens.
Nutrient solution and transplanting
Fertilizer selection for hydroponic vegetable gardens is very important. When Luis uses FloraNova nutrient solution, you can also choose other nutrient solutions.
- Mix the fertilizer and water according to the recommended dosage on the fertilizer package. The water and fertilizer should be mixed in a separate container to check whether the fertilizer is completely dissolved. The excess nutrient solution is stored in a closed container and placed in a dark, cool environment, which can be stored for several weeks.
- Pour the nutrient solution into the hydroponic bottle. Then transplant the seedlings into a hydroponic bottle. At this time, the nutrient solution may overflow. This is okay, it is better than insufficient nutrient solution.
- If you don’t need the absorbent strip, you can now transplant the seedlings into the bottle. The bottom of the stopper should be soaked in the nutrient solution, and the bottle should be filled with nutrient solution to ensure that the stopper absorbs the nutrient solution adequately. After the plug is immersed in the nutrient solution for several days, the roots of the crop can take root in the nutrient solution. The stopper should not be too deep into the mouth of the bottle, and part of it should be higher than the mouth of the bottle, so that the stopper should be squeezed out to supplement the nutrient solution later.
- Check the bottle frequently during the first week. Whether the plug is dry. Depending on the selected crop and environment, it may be necessary to add more nutrient solution in the first few days to ensure that the transplanted plants have long roots and can absorb water from the bottle. The absorbent strip is not necessary, but it will help prevent dehydration and dryness in the first week of transplantation.
Optional absorbent strip
When choosing tall and thin bottles as cultivation containers or planting slow-growing crops, you can properly equip some absorbent strips. The following steps use transparent bottles for demonstration, but it is not recommended to use transparent bottles to grow crops, because transparent bottles tend to breed algae and affect the normal growth of crops.
- Absorbent strip: cut the linen cloth into strips, the length is enough to touch the bottom of the bottle, and the width is the same as the width of the stopper (usually 2.5-5cm).
- Lay out the absorbent strip and place it in the bottle along the mouth of the bottle.
- Insert the cork into the bottle mouth and fix the absorbent strip.
- The rock wool reserved on the bottle stopper should protrude above the bottle mouth so that it can be easily pulled out when supplementing the nutrient solution.
- The funnel can add nutrient solution to the bottle without completely removing the rock wool plug. This can avoid damage to the roots of the crop when the cork is removed or re-plugged.
- If you are not using a funnel, be sure to pull the stopper from the bottle very carefully.
- Fill the bottle with nutrient solution. For seedlings with slow root growth, pour the nutrient solution to a position close to the mouth of the bottle. For plants with fast-growing roots, the nutrient solution can be filled with three-quarters of the solvent in the bottle to maintain the balance of air and nutrient solution absorption by the roots.
Be very careful when inserting the stopper back into the bottle, making sure that the roots of the crop are immersed in the nutrient solution.
System maintenance
Most crops suitable for bottle hydroponics grow rapidly and do not require much maintenance during the growth cycle. For crops that have a long growth period and can be harvested multiple times (such as basil), at least half a bottle of nutrient solution should be kept in the hydroponic bottle. In order to avoid nutrient imbalance in the nutrient solution, the bottle must be washed and refilled with fresh nutrient solution every month.
Some crops, such as the basil on the left in the right picture, have root growth faster than the nutrient level drops and do not need water-absorbing strips. However, some crops, such as the lettuce on the right in the picture on the right, have slow root growth and need to use water-absorbing strips to help their roots absorb water.
Other options
- Decoration In addition to the chalk drawing, the author also likes to decorate the hydroponic bottle with tag and burlap scarf. Surrounding the mouth of the bottle with linen cloth can effectively prevent the growth of algae on the surface of the plug. Then use a hot melt glue gun to fix the burlap on the bottle mouth.
- Light The bottle hydroponic vegetable garden is most suitable for indoor planting. These hydroponic bottles can be placed on the window sill so that they can receive both natural light and grow lights. Putting such a hydroponic bottle on the desk and illuminating it with a small growth lamp is very creative.
Troubleshooting
Plant wither
- Check the water level, if the water level is low, add nutrient solution.
- The water temperature or air temperature is too high.
The stopper falls into the bottle
- Try wrapping the cork in burlap so that it fits snugly against the mouth of the bottle.
- When plugging the bottle, some rock wool appeared on the top of the bottle.
Plants grow slowly or do not grow well
- The selected crops may not be suitable for bottled hydroponic vegetable gardens.
- The crop receives insufficient light.
- Special hydroponic fertilizers should be used.
Floating Plate Cultivation System
The floating plate cultivation system is a type of deep flow cultivation (DWC). Most traditional DWC systems need to maintain the plant at a fixed height and regularly supplement the nutrient solution to ensure that the root system can always be in contact with the nutrient solution. The floating plate cultivation system requires very little labor and maintenance. For example, when planting leafy vegetables, from transplanting to the final harvest, there is basically no need to maintain the system or even supplement water.
Crop Selection
The floating-plate cultivation system has been successfully applied to some large flowering crops such as tomatoes, but this system is more suitable for cultivating small plants with low oxygen demand in the root zone. The traditional DWC system is very suitable for planting large-scale flowering crops, because the system provides a large space for the root system, which helps air circulation, and growers often use air pumps to ventilate the nutrient solution. Luis has tested hundreds of crops on floating boards and found that the cultivation system is very practical.
The crops planted on the floating board actually float on the nutrient solution.
Suitable places: indoor, outdoor or greenhouse
Size: All sizes are available
Cultivation substrate: rock wool block
Do you need power supply: optional
Suitable crops: leafy vegetables and herbs
Here are some crops that can be grown on floating boards.
Best crop choices: basil, celery, leeks, dill (earth fennel), fennel, kale, lettuce, mustard greens, burdock, sauerkraut, Swiss chard, watercress.
Other optional crops: arugula, beet, carrot, parsley, dwarf pepper, dwarf tomato, marigold, mint, celery, water radish, spinach, strawberry.
Placement
Floating-plate vegetable gardens can be placed indoors, outdoors or in greenhouses. If there is no corresponding waterproof measures outdoors, rainy days will cause system problems. For example, rain water dilutes and washes away the nutrient solution. Floating-plate vegetable garden systems usually require a lot of water, and the effect may not be ideal when used indoors. For example, when the system is improperly placed indoors or there is a problem with the system structure, water leakage is likely to occur. In addition, considering the important element of water, the floating plate hydroponic system cannot be placed on a heavy floor.
The advantage of the floating plate hydroponic system is that it can aerate the nutrient solution, but it is not necessary for most crops. The author once used this system to grow beautiful lettuce and basil at 30 degrees without aeration. If ventilated, these crops can grow faster, and can effectively reduce the occurrence of crop root diseases and nutrient solution pollution. In addition, the system can also operate without a power system. If you do not want to supply power to the floating-plate vegetable garden, but also want to ventilate the system, you can install a solar air pump.
Floating Board Size
The floating plate cultivation system can also be applied on a workbench or a large site. Small floating boards have poor stability when cultivating large plants or heavier crops, but they do not have this problem when cultivating leafy vegetables. Large floating boards can bear heavier weight, but they should be handled with care when planting heavy crops, because when the floating boards are opened, they may break due to the heavy weight. Most floating boards are made by cutting into two halves a foam board of 60cm wide by 120cm long or 120cm wide by 240cm long. The floating board is usually rectangular, and the width is in increments of 60CM. But don’t be limited to rectangular, because these three foam boards can be cut into any shape. Luis has seen growers convert a round children’s pool into a floating board-style vegetable garden, while the floating boards floating on the water have different shapes.
How to make a floating plate cultivation vegetable garden
This design can be used as a production model for small or large floating plate cultivation vegetable gardens. No matter how large-scale the grower wants to build a vegetable garden, there are several production steps that will not change, such as adding a leak-proof lining and a floating board. If the planter wants to make full use of the existing container (such as a children’s swimming pool) as a floating board Caiguo’s liquid storage tank is not a new one, you can jump straight to the steps of making the board. I like this design very much, of course, the grower can also add personal ideas based on his own style. The test is that the temperature in the greenhouse is higher, so The first person tends to paint the vegetable garden white to avoid the temperature of the nutrient solution in the system being too high (over 35°C). If the grower plans to place the vegetable garden indoors or in a cool environment, it is best to paint the system dark.
Village materials and tools
Reservoir
4 wooden boards 5cm thick x 30cm wide x 240cm long
Two cushion strips 2.5cm thick x 5cm wide x 240cm long
Latex paint 4.5L
Primer, sealant, antifouling agent
450g self-tapping screw with a diameter of 5mm and a length of 6c
450g self-tapping screw with a diameter of 4mm and a length of 3m
1 piece of 1.8mx30mx2mm black plastic film
Kickboard
2.5cm thick x120cm wide x240cm
1 piece of long thermal insulation foam board
18 planting cups with a diameter of 5cm
Tool
Circular saw
Paint roller/paint brush
Set square
Spirit level
drill
Drill bit with screw
Nail Gun and Nail
Heavy shear
Shaver
Saw with clip
tape measure
Marker pen
A hole punch with a diameter of 5 cm (this tool is required if the planting cup is used)
Safety gloves
Working gloves
Goggles
Reservoir assembly
There are many ways to make the assembly of the reservoir easier. Most wood retail stores will cut wood to a specific size according to customer needs. Readers can refer to some of the sizes listed below to let the merchant help you cut the wood, thereby reducing the number of tools purchased, and can skip the process of cutting the wood by yourself. Readers can also customize the reservoir directly.
①Please wear work gloves and goggles, and cut 4 pieces of 5cm thick x 30cm wide x 240cm long wooden boards into the following lengths: the first board is cut into 5cm thick x 30cm wide x 130cm long and 5cm thick x 30cm wide x 70cm long wooden boards. One piece; the second board is also cut into 5cm thick x 30cm wide x 130cm long and one 5cm thick x 30cm wide x 70cm long wooden board; the third board is cut into 5cm thick x 30cm wide x 65cm long, 5cm thick x 30cm wide x 70cm long and 5cm thick x 30cm wide x 70cm long wooden board each;
The fourth board is cut into 5cm thick 30cm wide×65cm long and 5cm thick 30cm wide×70cm long wooden board; cut a section of 2.5cm thick×5cm wide from two 2.5cm thick x 5cm wide 2x40cm long mat strips. Wood strips 125cm long and 2.5cm thick x 5cm wide and 70cm long. The final length and quantity of cut wood are as follows:
2 pieces of 5cm thick 30cm wide X130cm long wooden boards;
5 wooden boards 5cm thick x 30cm wide x 70cm long;
2 wooden boards 5cm thick × 30cm wide and 65cm long;
2 pieces of 2.5cm thick 5cm wide x 125cm long cushion strips;
2 pieces of 2.5cm thick × 5cm wide × 70cm long cushion strips.
These woods can be painted before or after assembly.
②Put five 5cm thick 30m wide x 70cm long wooden boards flat on the flat ground. These wooden boards are the base of the cultivation system. Of course, it is also possible to build such a base not specifically for liquid storage, but the solid wood base can play a good fixing role and increase the structural strength. Moreover, the base can effectively avoid leakage of the liquid storage tank. Foam board is also often used as a base to effectively protect the inner village from ground abrasion.
③Fix a 5cm thick x 30cm wide x 130cm long board along the long side of the base, and fix a 5cm thick x 30cm wide 65cm long board on the short side. One end of the 130cm long board is perpendicular to the 65cm long board aligned.Refer to Figure ③ and Figure ⑤ to place the board in the correct position, and make sure that the base is rectangular and stable.
Use two 6cm long self-tapping screws to fasten the board.
④Place another 5cm thick x 30cm wide x 130cm long board against the long side of the base, and use self-tapping screws to vertically fix the other end of the 5cm thick 30cm wide x 65cm long board in ③.
⑤Place the remaining 5cm thick 30cm wide x 65cm long board along the other wide side of the base, place it between two 5cm thick x 30cm wide and 130cm long boards, and fix it with self-tapping screws.
⑥Invert the assembled base frame above, place 5 5cm thick x 30cm wide x 70cm long plates on the base frame in turn, and fix them on the shelf with 6cm long self-tapping screws to form a complete base
⑦Turn the entire base over.
⑧Installing the leak-proof lining is one of the most difficult steps in the assembly of the liquid storage tank. It is best to let the lining area placed inside the storage tank have surplus, so as to ensure that the lining is not too tight. If the leak-proof lining is installed too tightly, it may rupture and leak water due to excessive pressure after adding water. When making this reservoir, the author used two layers of 0.2mm thick plastic film to ensure that it is foolproof. Fold the lining leak-proof layer at the corner of the reservoir, keep it flush with the frame, and then fix it to the edge of the reservoir frame.
⑨ Use scissors to cut off the excess part of the inner tree impermeable layer. ⑩When fixing the cushion strip along the edge of the reservoir, press the plastic film lining under the cushion strip. The cushion strip is not very functional for the liquid storage tank, and it mainly plays a beautiful role. Use self-tapping screws to fix the spacer in place.
Floating board assembly
Growers can make their own floating boards, which is not difficult. Of course, the floating board can also be customized, but the price is usually more expensive. The customized floating board has holes specially designed according to the size of the seedling plug, so there is no need to use the planting cup. The grower can also make holes on the floating plate according to personal preference or the size of the seedling plug, without having to buy a planting cup. For this floating board system, the author prefers to use a planting cup because it is more convenient to use a planting cup. The customized floating board also has some other special designs, for example, it is very practical with sockets. Many functional design growers can be achieved through DIY.
⑪Use a blade to cut a 2.5cm thick 60cm wide X120cm long foam board from a 2.5cm thick x 120cm wide and 240cm long foam board, and remove all loose foam blocks along the cutting edge.
⑫Put this 2.5cm thick x 60cm wide x 120cm long foam board on the sawhorse and fix it with a clamp. ⑬In the hydroponic system, most leafy vegetables grow at a distance of 15cm. As shown in the figure below, when the plant spacing is 15cm, 18 plants (3 columns and 6 rows) can be planted on a floating board 2.5cm thick and 60cm wide×120cm long. Some leafy vegetables, such as romaine lettuce and basil, can grow upright, and 36 plants can be planted on a floating board 2.5cm thick and 60cm wide by 120cm long. Some growers plant kale, lettuce, etc. and some other vanilla plants, even planting higher density (each 2.5cm thick × 60cm wide × 120c long floating on the plant 72 or more) to measure and mark the plant Use a hole puncher with a diameter of 5 cm to punch holes on the floating plate.
⑭Some growers leave the reflective film on the floating board during DIY, and the author will tear off the reflective film to reveal a clean and flat white board.
⑮It is very important whether the size of the floating plate and the storage tank match. Adjust the size of the floating plate to make it perfectly match the reservoir. If the exposed area of the nutrient solution in the storage tank is too large, it is easy to grow algae; but if the floating plate is tightly clamped and is in the storage tank, the water level will drop and the floating plate will not move down, which may eventually cause roots. Lack of water.
⑯Put a planting cup with a diameter of 5cm into the pre-drilled hole on the floating plate.
Add nutrient solution, aeration and transplant
Pour water into the liquid storage tank, and add the water surface to 3cm away from the side of the tank. At this time, the water depth in the reservoir is about 25cm, and the water volume is about 230L.
Prepare the nutrient solution according to the recommended ratio in the instructions on the fertilizer package, mix the fertilizer fully into the water, and dissolve it completely. Regarding the management of the nutrient solution, refer to the relevant content of “6.1 Nutrient Solution Management” to adjust the EC value and pH value of the nutrient solution to an appropriate range.
Other options: Adding an air pump can improve plant growth and reduce the probability of root rot. In the figure below, there is a 4-channel air pump with a flow rate of 15L/min on the right side of the liquid storage tank. The air pump is connected to 4 circular sand heads with a diameter of 10cm evenly distributed in the liquid storage tank, which can pass the nutrient solution. Into a lot of air. The small air pump placed on the top edge of the liquid storage tank is connected to the small solar panel. This small air pump has only one channel, and the air output is only 1/4 of the large air pump, and only under the conditions of sufficient sunlight. start up. The cost of the solar air pump is relatively high, but it does not need to be energized and can be placed in any place exposed to sunlight. Float the floating board in the storage tank, and then transplant the seedlings. If cotton is applied well in this system, other common cultivation substrates are applied well in floating plate system. When using a substrate with strong water absorption capacity (such as coconut chaff or grass charcoal), pay special attention to the problem of excessive watering. The newly planted young roots are weak, and excessive watering can easily lead to root rot.
Aeration of the nutrient solution in the floating-plate hydroponic system is not necessary for leafy vegetables, but this measure will improve crop growth and increase the potential yield of the crop.
Some growers will even choose soil-grown seedlings, and the soil-grown seedlings may not be clean, and the cultivation system must be cleaned frequently to keep the system tidy.
System maintenance
Most leafy vegetables can be grown in this cultivation system, and there is no need for system maintenance from transplanting to harvesting. However, if you are cultivating crops with a long growth cycle, the nutrient solution must be replaced regularly.
Other options
If you want to build an NFT vegetable garden, you need to build a frame to support the PVC pipe above the floating board system. This frame also needs to install a set of plant growth lights, which can be used as supplementary light sources to solve the problem of low light in the greenhouse. If the system is placed indoors, this group of plant lights can provide sufficient light for crops.
Troubleshooting
Roots grow poorly or appear brown
- The water temperature may be too high.
- The pH value may be out of the appropriate range. Adjust the appropriate pH value of the nutrient solution according to different crop seedlings.
- The root system of the crop may be diseased, or the cultivated crop may be very sensitive to environmental changes. Before use, the storage tank, floating plate and planting cup should be rinsed and thoroughly disinfected.
Plant growth is slow
- Check the EC value to ensure that it is within the appropriate range.
- The vegetable garden may not have enough light.
- The water temperature may be too low. Some crops will grow slowly when the water temperature is lower than 18°C. Try to paint the reservoir black, equip it with a water heater, or choose some crops that are more resistant to cold.
The water level drops too fast
- There may be water leaks in the inner leak-proof membrane. Check whether there is water leakage around the storage tank. If the storage tank leaks, take out the existing lining, check whether there is any hard object that pierces the lining in the storage tank, and then replace it with a new lining. If the water is still leaking, try laying foam boards on the side walls and bottom of the reservoir, and then put on a new lining film.
Floating plate capillary cultivation system
The floating plate capillary I culture system is very practical. After simple modification, it can be applied to various substrates, fertilizers and suitable places. Similar to the hydroponic vegetable garden introduced in the previous article, the floating plate capillary vegetable garden does not need to be powered on, and the design is simple.
Capillary action is a natural phenomenon (the capillary is inserted into the immersion liquid, the liquid level in the tube rises and is higher than the outside of the tube, the capillary is inserted into the liquid, and the liquid level in the tube drops and is lower than the outside of the tube, which is the phenomenon of capillary action. The plate capillary cultivation system utilizes the surface tension and adhesion of the water through capillary action to make the water flow upward against gravity. To give a simple and common example, we can use paper towels to suck water up from the cup. In the floating board capillary cultivation system, the raised vegetable garden frame is the “cup”, and the finer substrates such as coconut bran, peat, soil, etc. are the “paper towels”.
Suitable places: Outdoors or in greenhouses, and can also be used indoors after modification
Size: Any size
Substrate: ceramsite, coconut bran
Do you need power supply: Not required
Applicable crops: leafy vegetables, vanilla, strawberry, short-flowering crops
There is a waterproof layer in the frame of the floating board capillary cultivation system. The waterproof layer is a paint spray layer with a thickness of about 0.2mm, which can effectively prevent leakage and protect the wooden frame from decay. The bottom of the cultivation bed is filled with a coarse, well-draining substrate, such as ceramsite, pebbles or gravel. The nutrient solution at the bottom of the cultivation bed is transported to the upper finer substrate through capillary action. Burlap-like knitted fabrics are used to prevent the substrate from falling into the reservoir. The system has a water inlet pipe and a water outlet pipe. The former is used to inject water into the liquid storage tank, and the latter can effectively prevent excessive water in the liquid storage tank.
Crop selection
Floating board capillary cultivation system is more suitable for growing moisture-loving crops, but not suitable for growing cactus plants that are not moisture-tolerant. Growers can design cultivation beds composed of multiple layers of substrates with different textures to create a dry environment while maintaining sufficient root moisture. However, it may take multiple attempts to find the best crops and the best garden size for the specific cultivation environment The combination
The size of the cultivation bed has certain restrictions on the selection of crops. Although large crops such as tomatoes or cucumbers can also be grown, the system usually only grows one crop due to the limited cultivation space.
Placement
Floating board capillary culture systems are mostly placed outdoors or in greenhouses. It can also be used indoors. It is necessary to install a collection bottle to collect the overflowing water, or to divert the overflowing water to the drainage tank to avoid damaging the indoor environment. If the overflow cannot be drained into the container, it is not suitable for indoor use unless it is specially modified.
The diversification of floating plate capillary cultivation system
The floating board capillary culture system is flexible in design and can be used in soilless vegetable gardens and traditional vegetable gardens. Some designs and modifications can also be made during the construction of the system in order to use traditional pot fertilizers, but this modification is not applicable in other hydroponic vegetable gardens. Listed below are some modification designs of the system, readers can modify the planting bed according to personal needs.
- The water inlet and water pipes can be replaced by polyvinyl hydride pipes (PVC) instead of vinyl pipes.
- Use metal troughs or pipes instead of wooden frames.
- Use rubber inner pads instead of painting.
- Use spray paint instead of different wooden boards for decoration.
- Build a wooden shelf to support large plants.
- Install beams above the cultivation bed to fix the plant growth lights.
How to make a floating plate capillary hydroponic bed
The several beds described below use water, but in fact this system can also be used for other types of substrate cultivation. Growers can try a variety of substrates. If it fails, just take the matrix out, replace the matrix and try again.
Materials and tools
Whole frame
2 light-colored wooden boards 2.5cm thick × 20m wide × 250m long
5 pieces of dark wood boards 1.5cm thick × 10m wide × 120m long
Several external screws 3cm long and 4mm diameter
Several wood screws with a length of 2cm and a diameter of 4mm
1 piece of black plastic film with 1.8m width×30m length and 2.5 thread thickness
1 black vinyl hose with a length of 60 cm and an inner diameter of 6 minutes
1 set of water injection/drainage accessories (with strainer) with an inner diameter of 6 minutes
1 tee with an inner diameter of 6 minutes
1 piece of 60cm×180cm linen
Protective equipment
Working gloves
Goggles
Matrix
10L ceramsite 60 cubic feet, coarse coconut bran
Tool
Circular saw
Set square
Spirit level
driller
Drill matching screws
Tape measure
Marker pen
3.5cm drill bit
3~36mm stepping step (6mm stepping)
Drill bit with a hole diameter of 5cm
Stapler and staples
Heavy-duty scissors
Sawhorse with clip
Deburring tool
0.65~3.5cm replacement drill
Other options
Blackboard paint
Paint Brush
Colorless epoxy fast curing agent
chalk
Assembly of the overall frame
In the process of assembling the cultivation bed, there are several methods to simplify the assembly work. Most wood shops cut wood into specific sizes according to customer requirements. When buying wood, you can ask the merchant to cut the wood according to the dimensions listed in the following steps, so that step ① can be skipped, the assembly process is simplified, and manpower and material resources are saved. In addition, the use of dark wood boards is just for aesthetics and can also be omitted.
①Wearing work gloves and goggles, cut two 2.5cm thick 20cm wide 250cm long pine boards to the following dimensions.
- Cut the first board along the long side and cut into four boards with a length of 45 cm and a board of 35cm.
- The second board is also cut along the long side, and cut into a board with a length of 35 cm and a board with a length of 50 cm.
② Cut five dark wood boards 1.5cm thick x 10cm wide and 120cm long along the long side.
- Cut four of them into two 50cm long and one 20cm long board respectively
- Cut the fifth board into 4 20cm long boards
The final cut wood size and quantity are as follows.
4 light-colored wooden boards 2.5cm thick x 20cm wide and 45cm long
Two light-colored wooden boards 2.5cm thick x 20cm wide and 35cm long
1 light-colored wooden board 2.5cm thick × 20cm wide × 50cm long
8 pieces of dark wood boards 1.5cm thick × 10cm wide × 50cm long
8 pieces of dark wood boards 1.5cm thick × 10cm wide × 20cm long
③This step is only for aesthetics and is not necessary. Brush blackboard paint on the cultivation bed, both before and after assembly. If it is painted before assembly, the paint should be painted on the wide sides of two 2.5cm thick, 20cm wide × 45cm long light-colored wooden boards, and the bottom of two 2.5cm thick × 20cm wide × 35cm long light-colored wooden boards.
④In order to ensure the overall frame shape is square and the structure is stable, as shown in Figure ④, take a 35cm long light-colored wooden board and a 50cm long light-colored wooden board and place them vertically together, and fix them with two 3cm screws. A 50cm long light-colored wooden board will be used as the bottom surface of the cultivation bed. ⑤As shown in Figure ⑤, the 450m long light-colored wood board is fixed to the 350m long splash-colored wood board with two 30m screws.
⑥ As shown in the figure, another 450m long light-colored wooden board is also fixed to the 350m long light-colored wooden board to complete the assembly of one side wall.
⑦ Repeat steps ⑤ and ⑥ to assemble the other side wall.
⑧ Install another 35m long light-colored wooden board, and the cultivation bed is assembled. As shown in Figure ⑧, the base of the 50m long light-colored wooden cultivation bed, the two 35cm long plates are the left and right side walls, and the upper and lower 45cm long plates are the front and back of the cultivation bed (two plates on each side) . ⑨ Punch a hole with a diameter of 3.5cm on the front side wall (45cm board) of the cultivation bed. The position of the hole is 15cm from the bottom and 7.5cm from the right side wall. Drill holes with a 3.5cm hole drill bit.
⑩Use a stepping drill to grind the above 3.5cm hole from the outside to the inside. The edge of the hole forms a certain slope, which is helpful for subsequent installation of the drain pipe.
⑪Put the black plastic film on the cultivation bed as the inner lining of the cultivation bed. Fold the plastic film at the corner neatly to ensure that the plastic film fits the inner wall of the cultivation bed.
⑫Fix the plastic film along the edge of the inner wall of the cultivation bed.
⑬ Use scissors to cut off the excess plastic film outside the cultivation bed.
⑭ Install drain pipe. As shown in Figure ⑭, connect a 7.5cm-long vinyl hose with an inner diameter of 6 minutes to the drain connector. When installing, do not tighten it first, and be careful that the rubber gasket falls off the joint.
⑮ Make a small hole in the plastic film lining corresponding to the drain hole, and this hole should be similar to the diameter of the drain joint.
⑯ Install the drain pipe on the cultivation bed and tighten the joint to prevent water leakage.
⑰Before starting the next step, be sure to check if the device is leaking! If there is water leaking around the joints. Need to adjust the lining and then tighten the joint. If you find water leaks elsewhere, you need to replace the lining. The water in the cultivation bed must be drained from the drainage pipe. After confirming that there is no leak, you can proceed to the next step.
Decorative cultivation bed with dark wood planks
This step is not necessary, and the decoration with dark wood boards is just for aesthetics. Spray paint can also achieve decorative effects. In the process of assembling the dark wood plank, Luis accidentally cut the plank to be 2.5cm shorter, so he came up with a temporary solution by patching a thin piece of wood to the corner. The size used has been corrected, so readers will not make the same mistake or miss an opportunity to create. Mistakes in the DIY process can also be called creativity!
⑱ As shown in Figure ⑱, use a drill with a diameter of 5 cm to make a hole in a 50 cm long dark wood board. The center of the hole is 5 cm from the long side and 7.5 m from the wide side.
⑲Install the dark wood board on the front side of the cultivation bed, and refer to Figure ⑲ for the position. There are two installation methods:
Method 1: Apply colorless epoxy resin fast curing agent on the board, stick it to the cultivation bed, and fix the board with clamps until the curing agent is dry.
Method 2: Use 2cm long wood screws to fix the wooden board on the cultivation bed.
Planting and decoration
㉙Cut a piece of burlap to cover the surface of the substrate in the cultivation bed.
㉚Fix the burlap to the cultivation bed with nails.
㉛In the position corresponding to the water inlet, make an opening on the linen cloth and cut off the extra linen cloth beside the cultivation bed.
㉜Open the opening in the corresponding position where the plant is planted.
㉝When transplanting seedlings, you can mark the seedling variety and transplanting time on the cultivation bed next to the planted seedlings.
㉞ After transplanting, water immediately from above the substrate to ensure that the roots of the seedlings are in full contact with the substrate.
㉟For the first two weeks after transplanting, you need to water the substrate every two days. Before the roots of the plants have penetrated deeply into the substrate, do not use the water inlet pipe for watering, because the roots of the plants are still very shallow and cannot absorb the water in the underlying substrate. After a few weeks, the root system of the plant has been pierced very deep, and the plant can be irrigated with the water inlet pipe. According to the cultivation environment, water from the top of the substrate at the right time.
㊱The substrate used in this cultivation system is not applied with base fertilizer, and all the nutrients needed by the plants come from the nutrient solution. Pouring the nutrient solution once a week can generally meet the nutrient needs of the crops in the system. When filling water into the system, add it to the drain pipe to start draining, and then the water filling can be stopped.
The burlap in the cultivation bed is mainly used for decoration, but in a higher temperature environment, it helps to maintain the humidity of the cultivation bed.
Nutrient Liquid Film Cultivation System
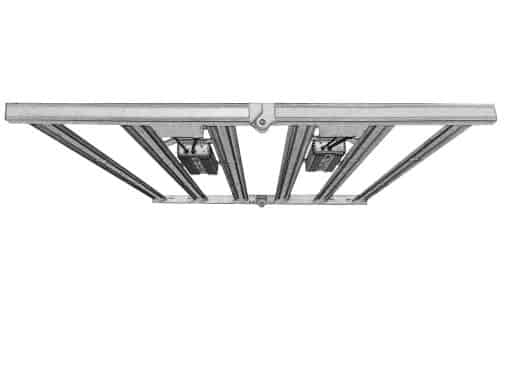
The nutrient solution culture system (NFT) is a cyclic hydroponics method in which the nutrient solution circulates in the cultivation pipe to provide the plants with the required water and nutrients. NFT is one of the most popular techniques for commercial planting of leafy vegetables. NFT only needs to be equipped with a small reservoir to supply water and fertilizer for dozens of plants. NFT is very popular among top growers, who only need to equip a small storage tank to fill the entire roof with NFT pipes without worrying about the roof’s load-bearing capacity. The weight of water cannot be ignored, and a larger liquid pool may exceed the load-bearing capacity of the roof. Many home growers, especially indoor growers, may also worry about the weight of the reservoir. NFT can be transformed into many forms and is a very popular DIY hydroponic technology. Luis has seen NFT pipes arranged in layers on the wall, assembled in pyramids or spirals. The NFT system is easier to incorporate creative elements, and the DIY NFT system is better than other systems. Here, Luis encourages everyone to try. However, we must first understand the limitations and construction details of the NFT system, so that growers can avoid wronged roads. The factors that determine the success of the NFT vegetable garden include crop selection, growth environment, pipe length, pipe slope, pipe shape and nutrient solution flow rate.
The nutrient liquid film cultivation system is simple and water-saving, and is a very popular indoor cultivation system.
Suitable places: indoor, outdoor or greenhouse
Size: Medium to large
Cultivation substrate: rock wool
Do you need power supply: Need
Crops: leafy greens, herbs and strawberries
Crop selection
The NFT system is suitable for growing green leafy vegetables, herbs and strawberries. Although the roots of these crops are relatively
Developed, but usually not so large as to restrict the flow of nutrient solution in the NFT system. But if you plant bigger crops, for example, the roots of tomatoes, peppers and cucumbers can clog the pipes. Some growers choose to use larger PVC pipes (10cm or larger) or wider tanks to cultivate these larger crops. Regarding planting large crops, you can give it a try, but in general, NFT is not suitable.
Placement
The NFT system can irrigate multiple pipes through only a small reservoir, and it can be used in the establishment of indoor vegetable gardens.
Popular when choosing a cultivation system. The NFT system is an excellent choice for roofs, classrooms, balconies, and residences.
NFT vegetable gardens usually form a light-shielding canopy, so it is necessary to install grow lights to supplement the light. For planting a variety of
For plants of different plant heights, it is a difficult problem to provide uniform light for plants. Although tall plants can receive a lot of light, they also block other short plants from receiving light. However, uneven light reception rarely occurs in indoor NFT vegetable gardens.
NFT pipeline
The pipe of the NFT vegetable garden mentioned here is composed of a PVC pipe with an inner diameter of 5 cm and a planting cup with a diameter of 5 cm. Other commonly used materials include PVC pipes with an inner diameter of 7.5 cm and sinks. If you use a sink, it is best to equip it with a sink cover to avoid algae growth in the pipe. For flat-bottomed pipes like sinks, sometimes water flows directly along the sides of the pipe instead of in the middle. If water flows on both sides, it is difficult for the roots of the seedlings to fully contact the nutrient solution. Pipes with grooves at the bottom can alleviate this problem by evenly distributing the nutrient flow along the bottom of the pipe.
The length of the pipe is an important factor to consider. Most commercial NFT pipelines vary in length from 1m to 5m. Longer pipelines may be prone to sagging, and several more support points are needed. The drooping of the pipe will cause the accumulation of nutrient solution, which will reduce the oxygen content in the root zone, increase the water temperature, and increase the probability of root diseases. In a hot environment, excessive heat is often accumulated. Therefore, it is not recommended to use long pipes. When a long pipeline is used, it takes a longer time for the nutrient solution to flow through the pipeline and then flow back to the storage tank. The longer the flow through the pipeline, the higher the temperature of the nutrient solution. Therefore, in high temperature environments, it is recommended that growers choose pipes less than or equal to 2.5m, unless they are equipped with nutrient solution cooling equipment or use other cooling methods.
The slope of the NFT pipeline is also important for controlling the heat accumulation of the nutrient solution and avoiding the accumulation of the nutrient solution in the pipeline. The generally acceptable range of slope is 1% to 4%. In commercial systems, the slope range is often set at 2% to 3%. The NFT system constructed in the article uses a 1.2m pipe, and the pipe is inclined so that the height difference between the two ends is 2.5cm, thus forming a slope of 2%.
Water pump failure and power outage
The biggest shortcoming of the NFT system is that it is easy to cause the crop to die quickly when the power is out. Plants growing in NFT pipes need to be irrigated continuously or very frequently. If the pump fails or the power goes out, the water content of the substrate and the water supply in the root zone will not be guaranteed. In a warm, sunny environment, stopping irrigation for 30 minutes may cause the crops in the NFT pipeline to die. The author has been working on a commercial farm running the NFT system for 5 years, and has witnessed many large-scale crop failures, almost all of which were caused by pump failures or power outages. Large-scale NFT farms will have backup generators in the event of a power failure to avoid large losses, but usually family growers do not have this
Kind of conditions. All the DY systems introduced in this book can guarantee the growth of crops for several days to several weeks without electricity, but the cultivation systems introduced here and after require the use of water pumps and circulating irrigation devices, which are very dependent on electricity. For the cultivation system introduced next, the complexity of its construction and the risk of failure have increased. Now, let us put aside these concerns and build some truly exciting soilless cultivation circulation systems.
Flow rate
The proper flow rate for most NFT vegetable gardens is 0.5-1L nutrient solution per minute per pipe. The author found that when the flow rate reaches 2.5L/min, the plants grow better. The method of measuring the flow rate of the pipeline is: connect the pipeline to be measured with the measuring cup, measure the amount of nutrient solution flowing out of the pipeline within 1 minute, or record the time required to fill 1L of nutrient solution, and then use this number to calculate the amount per minute Flow rate. In the “2.1 Irrigation” section, I explained in detail how to calculate the minimum pumping volume that meets the flow rate requirements. Since this calculation method is very important, repeat it here
Again.
The main factors to consider when choosing a water pump are the head, target flow rate and output tube size. Most systems only need a pump with sufficient pumping pressure to deliver water to a specific height. For example, when a grower chooses a pump for a tidal system, the main concern is whether the pump’s water delivery height is greater than the distance from the pump outlet to the tidal seedling tray. However, some systems have higher requirements for flow rate, such as NFT and spray culture systems. For these systems, the influence of the conveying height on the flow rate must be considered. When the water delivery height of the pump is 1.2m, it can transport 2.2 tons of water per hour; when the water delivery height is 3m, it can only deliver 0.75 tons of water per hour.The number of pipes in the irrigation system also affects the flow rate. Generally speaking, the water output of the pump should be slightly larger than the pump with a small water output. If the water output of the pump is too large, the flow rate can be reduced through the valve; but if the water output of the pump is insufficient, there is no way to make up. Generally speaking, it is better to choose a pump with a larger water output. Valves can reduce the flow rate, but it is impossible to increase the flow rate.
For example, the target flow rate of the NFT system is 55Lh per cultivation pipe, and the system has 20 pipes, which means that the pump must be able to transport 55Lh of water to 20 pipes at the same time, that is, the total amount of 55L/hx20 pipes is 1100Lh. In addition, it is also necessary to consider the problem that the pipe is located 30cm above the water outlet of the water pump. Therefore, the actual water output of the pump needs to be greater than 1100Lh.
How to make a nutrient liquid film cultivation system (NFT)
Note: The liquid storage tank in this system is the same as the liquid storage tank of the floating plate cultivation system mentioned earlier in this chapter (see “3.3 floating plate type for details”
Training system”)
The construction of the NFT vegetable garden does not require the construction of a floating plate cultivation system. The reservoir can be customized, and various waste materials can also be used (such as opaque
Plastic box). In a high temperature environment, the liquid storage tank can be partially buried in the ground, which is conducive to reducing the temperature of the nutrient solution.
Material
Frame
2 wooden boards of 5cm thick X15cm wide and 250cm long 3
2 wooden boards 5cm thick and 10cm wide and 250cm long
White water-based latex primer, sealant and anti
Stain blocking agent 4L
Several external screws with a length of 6.5cm and a diameter of 10mm
Several external screws of 3cm length and 4mm diameter
Pipeline
3 PVC pipes with a length of 3m and a diameter of 5cm
22 planting cups with a diameter of 5 cm
irrigation
4 PVC tees with a diameter of 5cm
6 PVC plugs with a diameter of 5 cm
4 elbows with a diameter of 6 minutes
3.5m long, 6-minute diameter black vinyl hose
1m long, 6mm diameter black B hose
1 self-locking cable tie
9 two-hole pipe clamps with a diameter of 6 minutes
1 washer with a diameter of 6 minutes
4 barb connectors with a diameter of 6mm
1 220L submersible pump Bottom lighting system (optional)
120cm six-tube T5 grow light 1
1 lamp boom
Tool
Paint roller and/or paint brush circular saw
Deburring tool
driller
Hacksaw
6~35mm 10-step step drill
tape measure
Marker pen
7cm diameter drill
Set square
Spirit level
Screws matched with drill bits
Sawhorse with clip
5cm diameter drill
Irrigation line punching machine
Heavy-duty scissors
Protective equipment
Working gloves
Goggles
Prepare wood and PVC pipe
Most wood shops will cut wood to a specific size according to customer requirements. Some home improvement stores
It is also possible to cut PVC pipes. Please follow the size listed in the steps below to ask the merchant to cut, save the wood
And PVC pipe cutting work, saving manpower and material resources
①Wearing work gloves and goggles, cut two 5cm thick x 15m wide x 250cm long wooden boards into the following dimensions (cut along the long side).
・The first board is cut into two 120cm long boards
Cut the other board into two 80cm long boards
② Cut two 5cm thick x 10cm wide x 250cm long wooden boards into four 120cm long boards. The final cut wood size and quantity are as follows:
5cm thick × 15cm wide × 120cm long 2 pieces
5cm thick × 15cm wide × 80cm long 2 pieces
5cm thick×10cm wide×120cm long 4 pieces
③Paint the wood before assembling.
④ Cut the 5cm diameter PVC pipe to the following dimensions, and polish the cut edges with a deburring tool.
110cm long tube 4 sections
3 sections of 6cm tube
1 section of 10cm tube
7.5cm long pipe 1 section
6-point diameter washer
Assembly of liquid return pipe
The return pipe is used to collect the drain from the NFT pipe. Before putting all the components together, the total length of the liquid return pipe should be controlled within 70cm. If it is longer, the 7.5cm-long PVC pipe can be changed to 6cm. The centers of the tees are 12.5cm apart. Of course, this distance can be adjusted, but 12.5cm is the best for growing lettuce and basil. At one end of the liquid return pipe (connected with a 10 cmpvc pipe), install a 6-point elbow for subsequent production of the drain pipe. The drain pipe also needs to be equipped with a 6-point head, which is responsible for draining the water back to the storage tank (see below for the specific production method. A translator’s note). Before bonding, check whether there is enough space to install the head.
During the production process, the grower may find that the dimensions of their PVC tee and plug are different from those in this book, and they can make appropriate adjustments according to the actual situation. ⑤As shown in Figure ⑤, connect four PVC tees with a diameter of 5 cm and three PVC ties with a diameter of 6 cm in series. Glue them together to ensure that all the three links are on a flat surface.
Connect a 10cm-long PVC pipe to one end of the tee combination in series, and a 7.5cm-long PVC pipe to the other end, and install plugs on both ends of the three-way combination.
Connect one end of a 10 cm PVC pipe to install a drain pipe with a diameter of 6 minutes. Divide a diameter of 6 points
The elbow is inserted into the PVC pipe, and another elbow with a diameter of 6 minutes is connected to it to guide the water flow into the storage
Liquid pool. Check whether there is enough space to install the elbow before drilling. Drill the PVC pipe slowly without checking the hole
Whether it can accommodate the gasket. Most 6-point washers can be installed in 2 ~ 2.5cm holes.
Install the washer on the hole and insert a 6-point elbow.
Assembly of the overall frame
⑨ Put the liquid return pipe on a wooden board 5cm thick x 15m wide x 80cm long. The placement method is shown in Figure ⑩: the end caps at both ends are at least 4cm away from the wide side of the board, and the liquid return pipe is 1.5cm away from one long side of the board and 6.0cm away from the other long side. After placing it, use a marker to draw a circle along the corresponding position of each three-way port.
⑩ Repeat step ⑨ on another 5cm thick x 15cm wide x 80cm long wooden board. Be sure to draw a circle near the long side of the board. The position of these marks will determine the slope of the NFT pipe
5cm thick x 15cm wide x 80cm long wooden boards will be used as left and right beams. One by one Luis Note).
⑪Use a 7cm hole drill to drill holes in the circled position. Clean the sawdust from the board. ⑫ Place the left and right beam planks with the holes along the wide side of the reservoir. A 5cm thick × 15cm wide × 120cm long plate (as front and rear beams. A translator’s note) is placed on it along the long side of the reservoir for positioning the frame legs (5cm thick, 10cm wide and 120cm long. The board is the outrigger. The installation position of the translator’s note)
⑬Fix the frame legs on the reservoir, you need to use a ruler and a triangular plate for assistance to ensure that the support is upright and does not tilt. Fix the legs with two 6.5cm-long screws.
⑭ Fix the front and rear beams vertically on the outriggers. The two ends of the board should be flush with the tops of the legs.
⑮Mark the position of the left and right beams. The NFT cultivation tube needs to form a certain slope when passing through the left and right beams. Therefore, the beams at both ends of the frame are somewhat different when installed. The left beam is 13c from the wide side of the front and rear beams, and the right beam is 16 cm from the other wide side of the front and rear beams. ⑯ Place the left and right beams, one is to place the side with the drilled hole facing down, and the other is to place the side with the drilled hole facing up. Use screws to fix the left and right cross beams, but do not tighten them first. When inserting the NFT cultivation tube, you may need to adjust the cross beams slightly. After the pipe is inserted, fix it with screws.
⑰ Insert a 110cm long PVC pipe into the left and right beams as a cultivation pipe
⑱ Connect the liquid return pipe to one end of the cultivation pipe. The drain elbow is placed on the underside of the liquid return pipe. There is no need to glue it on yet.
⑲Mark the position of the planting cup on the cultivation tube. In this design, the spacing between the planting cups in the cultivation pipes is 15cm, and they are arranged in a checkerboard format to create more space for plants between adjacent pipes.⑯ Place the left and right beams, one is to place the side with the drilled hole facing down, and the other is to place the side with the drilled hole facing up. Use screws to fix the left and right cross beams, but do not tighten them first. When inserting the NFT cultivation tube, you may need to adjust the cross beams slightly. After the pipe is inserted, fix it with screws.
⑰ Insert a 110cm long PVC pipe into the left and right beams as a cultivation pipe
⑱ Connect the liquid return pipe to one end of the cultivation pipe. The drain elbow is placed on the underside of the liquid return pipe. There is no need to glue it on yet.
⑲Mark the position of the planting cup on the cultivation tube. In this design, the spacing between the planting cups in the cultivation pipes is 15cm, and they are arranged in a checkerboard format to create more space for plants between adjacent pipes. ⑳Remove the pipe from the frame and make a hole. When drilling a hole for the planting cup, first fix the pipe with a saw frame with a clamp, and use a drill with a diameter of 5 cm to drill the hole. The drill bit is placed on the PVC pipe and kept vertical. Once the drill is tilted, it is likely to penetrate the sidewall of the PVC pipe.
㉑Use a deburring tool to clean up the hole.
㉒The drilled pipe should be drilled upward and glued to the return pipe.
㉓Insert the cultivation tube connected to the liquid return tube back into the beam.
㉔Place a lid on the other end of the cultivation tube, but don’t use glue to glue it
㉕Mark the position of the water injection pipe at one end of the cultivation pipe, as shown in the figure ㉕.
㉖Drill a small hole at the marked position, and then use a deburring tool to polish the small hole. The size of the hole is polished to just fit a 6mm diameter vinyl hose. When inserting the hose, make sure that the hose is tightly inserted on the PVC pipe. Drilling holes before the pipe assembly may be easier to operate.
Assemble the irrigation system
㉗The main liquid supply pipe connected to the cultivation pipe is a 6-minute diameter vinyl hose connected to the submersible pump in the liquid storage tank. The pipe extends upwards along one of the legs of the frame and is guided by an elbow. The liquid pipe straddles the beam and finally ends with a 6-minute elbow. Reserve a 10cm-long vinyl hose end at the terminating elbow. Fold the remaining section of the tube and tie it tightly with a cable tie. When cleaning the system, you can remove this cable tie to clean the pipeline. When cleaning the pipeline, the grower can use the elbow at the end to draw water away from the system. Fix the liquid supply tube with a 6-point two-hole tube clamp and a 3cm-long screw.
㉘Punch four holes in the upper part of the vinyl hose with a hose puncher, and insert the double-ended connector into these holes.
㉙Cut four sections of 20m long pipe from a 6mm diameter black vinyl hose. One end of the pipe is connected to the 6mm inverted connector, and the other end is inserted into the PVC pipe. The hose should be placed in the pipe so that the water will flow down the pipe.
㉚Place a lid on one end of the cultivation tube. Do not use glue for the cover, so that it can be removed for cleaning at any time in the future, and it is easy to eliminate potential problems or malfunctions. ㉛Connect the elbow on the return pipe with another 6-point elbow through a small 6-point diameter hose to form a 6-point diameter drain pipe, which can guide downward drainage and also make it branch along the frame It becomes easy to lay drain pipes on the legs. The drain pipe should be placed at the bottom of the reservoir. At the same time, the submersible pump and drain pipe should be placed on a corner line so that when the system is running, water will circulate between the reservoir and the pipe.
㉜Cut off the bottom of the planting cup with a diameter of 5cm, and adjust its position and height in the pipe. This can ensure that the seedlings are in full contact with the nutrient solution, and the plants can be more easily taken out of the planting cup during harvest. Put the planting cup into the pipe.
㉝Take the screws at the joints of the left and right beams and the front and rear beams to make them firmly fixed on the front and rear beams.
㉞If this NFT vegetable garden is built on a floating plate cultivation system, it would be better to install a growth light above the floating plate system. Of course, plants can also grow without a growth lamp, but the growth may be relatively slow and the planting cycle will be longer. In this design, a set of 120cm long six-tube growth lamp is used.
Cultivation and harvest
㉟Before the seedlings are transplanted to the cultivation pipe, you should be able to see the roots emerging from the bottom of the planting cup.
㊱Basil or some other herbs can be harvested multiple times. But sometimes the roots of these plants grow too large, which restricts the flow of nutrient solution in the pipe.
㊲Many NFT growers like to pick live plants. Indoors, the whole plant can be uprooted and placed in a glass of water, and some leaves can be picked when needed. This keeps the vegetables fresh and is a great way to share the harvest with friends.
㊳The planting cup can be reused. The roots left on the planting cup are taken down to make compost. The planting cup is cleaned and can be recycled.
Troubleshooting
(1) The pipeline is blocked
.Check if the root is blocking the pipe. If necessary, after harvesting the crops, remove the pipeline for inspection.
.Check whether the ceramsite or other substrates block the drain pipe.
(2) The liquid supply pipe is blocked
If a ball valve (stop valve) is used in the system, all the liquid supply pipes except the blocked pipe can be closed. If the pressure is not enough to wash away the blockage, please use an unfolded paperclip to push down the tube to push out the debris in the tube. If the pipeline still cannot be dredged, a new hose with a diameter of 6mm needs to be replaced. If it is still not smooth after replacing the new pipe, you need to replace the double pipe joint.
Barrel cultivation system
Top drip is a soilless culture technology with various forms and designs, but they all have a similar feature, that is, the irrigation pipe is watered from above the substrate. A flow rate regulator is often installed on the irrigation pipe to control the flow rate, thereby forming a top dnp. One of the most popular forms of top drip is the Dutch bucket. The bottom of the Dutch barrel is sealed, and there is only one drainage position on the barrel. This position is slightly higher than the bottom of the bucket, so that the water can be directed into the collection tube, which will lead the used nutrient solution back to the reservoir for recirculation.
Suitable places: indoor, outdoor or greenhouse
Size: Medium to large
Growth substrate: pearl or ceramsite
Do you need power supply: Need
Crops: leafy green vegetables, large flowering crops, such as tomatoes, cucumbers and peppers
The Top drip system pours the nutrient solution from the top of the substrate.
Single barrel and double barrel
Traditional Dutch barrels are filled with substrate in a barrel. The single barrel system has two disadvantages: it is difficult to check the health of the plant roots, and if the drainage system is blocked, it is difficult to unclog. These limitations can be eliminated by using a double barrel system. For example, in the double-barrel system designed and constructed in this chapter, two barrels are set together.
The barrel inside is filled with substrate and has many drainage holes. The barrel sleeved on the outside has a single drain hole, which is connected to the water collection pipe leading to the liquid storage tank. In the double-barrel system, the inner barrel can be taken out to check the health of the root. Temporary removal of the inner barrel makes it easier to fix the plug and effectively prevents the nutrient solution from flowing into the collection tube.
Most commercial soilless farms are still using the single-barrel system because of its lower cost than double-barrel and its strong planting capacity. For the new generation of soilless cultivation, the ability to check the health of the root system is very important, so this chapter shows the construction method of a double barrel system.
Crop selection
Dutch barrels are commonly used for large flowering crops such as hops, tomatoes, peppers, cucumbers and eggplants. Many of these large crops can be grown for a year or more in Dutch barrels. Leafy greens and herbs can be grown in Dutch barrels, but most growers prefer to make the most of their barrels to grow large flowering crops.
Placement
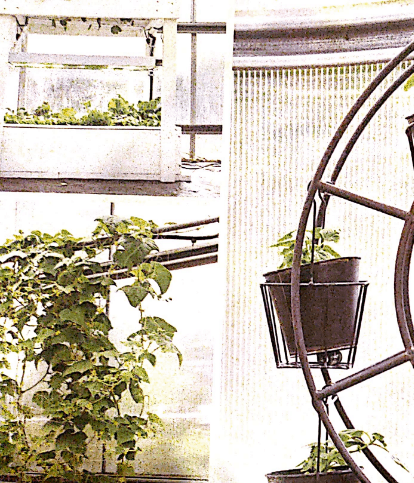
Because crops can grow very large, Dutch barrel gardens are usually placed outdoors or in greenhouses. Many growers who use Dutch barrels install an auxiliary net next to the barrel so that the plants can climb up and grow, saving space and easy management. It’s okay to use Dutch barrels indoors, but you usually need to use grow lights to fill the light. The growth light can be installed vertically to supplement light for the crops on the vertical auxiliary net. Most indoor growers will install a trellis that is level with the auxiliary net to wrap the plants horizontally on it to form a canopy that receives even light. A good canopy of plants can make neighboring plants less shade and high utilization of light, which is very important for plant growth.
How to build a barrel cultivation system with circulating water supply
Main frame
1 piece of 5cm thick 30cm wide x 250cm long wooden board
White water-based latex primer, sealant and antifouling blocker 4L
Several #10 screws with a diameter of 8cm and length
Cultivation barrel
2 square buckets
1 inner diameter 6-point elbow
1 inner diameter 6-point washer
Matrix
Ceramsite
Irrigation system
1 P/C tube with a length of 120m and an inner diameter of 4cm
1 rubber plug with an inner diameter of 4cm with a pipe buckle
1 rubber elbow with inner diameter of 4cm with pipe buckle
2 two-hole pipe clamps with inner diameter of 4cm
75L reservoir
1 black vinyl hose with a length of 150cm and an inner diameter of 6 minutes
1 550GPH submersible pump
Internal diameter 6 points two-hole pipe clamp 3 self-locking cable tie 1
2 barb connectors with inner diameter 6mm and 1 black vinyl hose with a length of 120cm and inner diameter of 6mm 1 outlet timer 1
Irrigation system
1 P/C tube with a length of 120m and an inner diameter of 4cm
1 rubber plug with an inner diameter of 4cm with a pipe buckle
1 rubber elbow with inner diameter of 4cm with pipe buckle
Two-hole pipe clamp with inner diameter of 4cm and 2 75L reservoirs
1 black vinyl hose with a length of 150cm and an inner diameter of 6 minutes
1 550GPH submersible pump
Internal diameter 6 points two-hole pipe clamp 3 self-locking cable tie 1
Two 120cm long, 6mm inner diameter barb connectors
1 black vinyl hose with an inner diameter of 6mm
1 water outlet timer
Tool
Circular saw
HacksawPaint brush/roller
Horizontal tool
Set square
tape measure
Marker pen
driller
5mm diameter drill
Screws for drill bits
6~36mm10 ladder drill
Deburring tools
Heavy-duty scissors
Irrigation line punching machine
Optional tools
Auxiliary network (1.5m×9m
9cm2 mesh)
Ball type (close valve) 2
2 drops of arrows
Trellis Netting
Protective equipment
Working gloves
Goggles
Assemble the overall frame and prepare the cultivation barrel
It is important to choose a suitable cultivation barrel. A square bucket is a good choice. When putting two buckets together, there must be at least a 5cm gap between the bottom of the bucket. Such square buckets can be found in grocery stores and bakeries. These square buckets are usually used to hold baking ingredients.
When buying wood, you can ask the merchant to cut the wood to the required size, which not only saves manpower and material resources, but also simplifies the process of frame assembly.
The overall frame is not horizontal, but inclined at a certain angle to the reservoir. If you choose cinder or a mixture of cinder and sawdust as the cultivation substrate, pay attention to the load-bearing capacity of the frame. When the substrate absorbs water, the cultivation barrel will become very heavy. Make sure that the frame can bear enough weight.
①Wearing work gloves and goggles, cut a 5cm thick 30cm wide X250cm long wooden board into the following dimensions:
5cm thick 30cm wide 40cm long as a shorter leg
5cm thick 30cm wide x 41cm long as a longer leg
5cm thick x 30cm wide x 60cm long as the frame table top
②Clean the cultivation barrels, including removing the labels on the barrels.
③Spray paint the wood before assembly. In this system, two square buckets need to be put together. The outer barrel can be painted according to personal preference; the inner barrel does not need to be painted.
④ Mark the position of the drainage hole on the bottom of the inner bucket, and drill a few drainage holes with a drill with a diameter of 5mm.
To ensure that the cultivation barrel can drain quickly. ⑤Use 40cm and 41cm long wooden boards as the legs of the overall frame. The 40cm long (shorter) leg is on the side close to the reservoir, forming a slope that slopes toward the reservoir. As shown in Figure ⑤, the longer (41cm) leg is installed flush with the edge of the desktop; and the shorter (40cm) leg is installed on the other side of the desktop with the green inwardly retracted 20cm. Use level, square and 8cm screws to complete the above assembly.
⑥The lid of the barrel can effectively reduce the growth of algae and can keep the lid of the cultivation barrel. Depending on the location of the planting, make holes in the lid that are slightly larger than the planting holes. This kind of cultivation barrel can generally grow more than two plants.
Install irrigation system
This cultivation system can be expanded with multiple cultivation barrels. When expanding, it is necessary to increase the length of the overall frame, the PVC pipe with an inner diameter of 4cm, and the length of 6-point vinyl hose. At the same time, for each additional barrel installed, a set of 6mm inner diameter vinyl hose and its components need to be added accordingly.
⑦Cut the PVC pipe with an inner diameter of 4cm into 25cm and 65cm sections respectively
⑧Put the cultivation barrel and the 65cm-long PVC pipe in a suitable position on the frame table top, and ensure that there is enough space at both ends of the PVC pipe to fix the two-hole pipe clamp.
⑨Put one end of the 65cm-long PVC pipe with a rubber plug and tighten the buckle.
⑩Connect the rubber elbow to the other end of the tube and tighten the buckle.
⑪Afterwards, fix the two ends of the pipe on the frame table top with a two-hole pipe clamp with an inner diameter of 4cm (as shown in Figure ⑩).
⑫ Punch a 2.5cm diameter on the above-mentioned PVC pipe, which is used to install the 6-point elbow of the drainage pipe, and the other end of the elbow is installed on the outer barrel. ⑬Use a deburring tool to polish the edge green of the hole. Deburring tool can also expand the hole
⑭Connect the 6-point head with the outer barrel and 65m long PVC pipe together.
⑮Punch a 5cm diameter hole on the lid of the liquid storage tank to install a 25cm long PVC drainage pipe (inner diameter 4m). Choose a suitable hole position to reduce the curvature of the rubber elbow.
⑯ Connect the two PVC pipes (250m long and 65cm long) together with rubber elbows.
⑰Afterwards, as shown in the figure, make a hole with a diameter of 2.5cm on the lid of the liquid storage tank to install a 6-point black vinyl hose.
⑱ Connect one end of the hose to the submersible pump in the reservoir.
⑲The other end of the hose is laid along the green edge of the frame table top. Fix it with a 6-point two-hole pipe clamp.
⑳ A section of hose is reserved at the end of the hose, about 15cm in length.㉑Fold the remaining hose in half and fasten the folded part with a self-locking cable tie. In the subsequent use process, if you want to flush the irrigation pipe or expand the irrigation system, you can remove the tie.
㉒Punch a small hole in this vinyl hose to install a 6mm barb connector. You can use an irrigation line puncher or screws to punch holes. Punch a smaller hole first, and then gradually enlarge it to prevent the hole from being too big at once. If the hole diameter is too large, replace the entire 6-point vinyl hose. After that, insert the barb connector into the small hole and install the second barb connector in this way. This is similar to the design of the nutrient liquid film cultivation system, please refer to “3.5 Nutrient Liquid Film Cultivation System”.
㉓Put the washed ceramsite into the cultivation barrel.
㉔Remove the liquid storage tank, water the cultivation barrel, and wash the plastic in the cultivation system and the residual impurities in the substrate.
㉕After rinsing, put the reservoir back in place and inject some water.
㉖Take two pieces of black vinyl hose with a length of 60cm and an inner diameter of 6mm, and connect them to the barb connectors on the 6-point black vinyl hose.
㉗Turn on the water pump to check the irrigation system. Check whether the 6-point hose is leaking. If you find water leaking at the barb connector, you need to replace the entire 6-point hose. If the water is leaking at the end of the 6-point hose, simply fasten the cable tie or replace the cable tie. ㉘In the drip irrigation design, ball valves (close valves) and drip arrows can be used. Although this is not necessary, it is very helpful in practice. If one pump supplies water to multiple cultivation barrels at the same time, the ball valve can ensure that the water supply of each barrel is equal to prevent the distance from affecting the water supply.
㉙Fill the reservoir with water and add fertilizer to adjust the pH. Connect the water outlet timer to the pump, and the irrigation cycle is: run for 15 minutes, stop for 30 minutes, and execute this cycle for 24 hours. This irrigation cycle is based on the hot, strong light environment in the author’s area. If you are indoors or in a colder environment, it is best to increase the interval between two irrigations. The specific interval length needs to be determined according to the local environment. This system uses ceramsite as the cultivation substrate. This substrate drains quickly and will not affect plant growth due to the large amount of water in the cultivation barrel.
After planting, turn on the water pump and check the water supply of each seedling. If some seedlings cannot be watered, you can adjust the position of the 6mm hose and the drop arrow to ensure the water supply for each seedling.
For large, climbing plants (such as cucumber), the auxiliary net is very practical, it can guide the vertical growth of the plant, easy to manage, and save space.
Bed cultivation system
The cultivation bed is a relatively simple hydroponic equipment. The liquid storage tank is generally located under the cultivation bed and supplies water and fertilizer to the cultivation bed. The design is very similar to the tidal cultivation system mentioned in the next section. The main difference is how to hold the substrate: the cultivation bed system puts the substrate directly into the cultivation tank, while the tidal irrigation system requires the substrate to be placed in the basin first. , And then put it into the cultivation tank.
(1) Advantages
Can be used to cultivate a variety of crops
Can be used as a fish-vegetable symbiosis system to provide sufficient space for the growth of beneficial bacteria
(2) Insufficient
There are certain requirements for the choice of substrate, and the substrate with finer texture is not suitable for this system
Equipment is difficult to clean
Crop selection
It is best to plant plants with a longer growth cycle in the cultivation bed, because every time the crop is pulled, some roots will inevitably be left in the substrate. If you plant crops with a short growth cycle, such as fast-growing vegetables such as lettuce, a large amount of residual roots will soon accumulate in the substrate. Planting vanilla is a good choice. Vanilla has a strong regenerative ability and can be harvested many times without uprooting the plant or destroying the root system. The cultivation bed described in this book is not suitable for planting flowering and fruiting plants such as tomatoes and cucumbers due to its small size. Of course, large cultivation beds can also be designed, and the cultivation beds in some large fish-vegetable symbiosis systems can grow fruit and vegetable crops.
Suitable places: indoor, outdoor or greenhouse
Size: All sizes are available
Growth substrate: ceramsite
Do you need power supply: Need
Crops: green leafy vegetables, vanilla (vanilla is a general term for spice plants, including lavender, rosemary, thyme mint, etc.), strawberries and other crops
Fish and Vegetable Symbiosis System Cultivation
The culture bed can be used as a fish-vegetable symbiosis system, which is a very fashionable cultivation method. The cultivation bed can carry out physical and biological filtration of fish excrement. The rough substrate in the cultivation bed provides sufficient space for the growth of beneficial microorganisms, which can decompose fish excrement into nutrients that can be used by plants. At the same time, the cultivation bed can intercept solid fish excrement and help keep the fish tank clean.
In the first few crops of planting, the cultivation bed usually works well, but as the number of cultivation crops increases, the cultivation bed needs to be cleaned. The root system remaining in the substrate begins to degrade, and organic matter gradually accumulates in the cultivation bed. Although the cultivation bed can degrade some organic matter into nutrients for plant growth, the large accumulation of organic matter will exceed the cleaning ability of the cultivation bed itself. As the number of cultivation stubbles increases, the substrate in the cultivation bed needs to be removed and cleaned up. The substrate in the cultivation bed can generally be reused after disinfection, washing and other treatments.
Placement
The cultivation bed can be used in a variety of environments. The cultivation bed built in this book is recommended to be placed indoors. Although it is not impossible to place it outdoors or in a greenhouse, if it is placed outdoors, there are some problems that need to be noted: when it rains, the reservoir may be filled with rainwater, causing the nutrient solution to be diluted. If this happens, chemical fertilizers need to be added in time to adjust the concentration of the nutrient solution and maintain the EC value within a proper range.
Substrate selection
Ceramsite, pebbles, volcanic rock, gravel, etc. can all be used as substrates in the cultivation bed. The selection of the cultivation bed substrate should comply with the following two criteria: large particles, neutral pH (avoid limestone). Before use, the substrate needs to be rinsed. Large chunks of rough coconut bran (coconut bright block) can also be used as a cultivation substrate, but it should be noted that the water storage capacity of coconut bran is stronger than that of general substrates. When using it, it is necessary to reduce the frequency of irrigation. In addition, it will be held together with the root system, resulting in more roots remaining in the substrate, thereby increasing the frequency of substrate cleaning. In addition, the coconut itself will also degrade. After a period of use, the coconut chaff needs to be replaced.
Irrigation method
Traditional irrigation methods require the installation of water supply and drainage devices, both of which are installed at the bottom of the cultivation bed. The water supply device is flush or nearly flush with the bottom of the cultivation bed; and the drainage device is installed at a higher position, slightly lower than the upper surface of the cultivation bed. In an irrigation cycle, the nutrient solution is pumped into the cultivation bed through the water supply device, and then flows back to the liquid storage tank through the drainage device. The drainage device effectively avoids the accumulation of water in the cultivation bed. When the circulation is over, the nutrient solution in the cultivation bed flows back to the liquid storage tank through the water supply device. There are other more recent irrigation methods, including Bell (Bl) siphon and shape siphon. But for beginners, the author still recommends the use of traditional water supply and drainage devices.
How to build a beautiful vegetable garden with substrate cultivation bed
Tool
Drill 6~36mm 10-step drill
Deburring tool
Heavy-duty scissors
Irrigation line punching machine (optional)
Safety equipment
Working gloves
Goggles
Material
Indica Culture Bed
35cm long x 28cm wide and 8cm high plastic box (used as a cultivation bed) 1
1 plastic box with a length of 38cm and a length of 27cm and a width of 23cm (approximately 15L, used as a liquid storage tank)
Scotch tape
Black spray paint
Irrigation system
1 set of water supply/drainage accessories combination
6-point inner diameter water supply/drainage accessories (with filter)
4 points inner diameter water supply/drainage fittings (with filter)
1 piece of 35cm long, 4 points inner diameter black vinyl hose
160GPH submersible pump 1
Timer 1
Cultivation substrate
Ceramsite 10L
Waterwheel (optional)
1 inner diameter 6mm inverted connector 1 black vinyl hose with inner diameter 6mm 90cm waterwheel 1
Inner diameter 6mm choke valve 1 self-locking cable tie 1
Prepare storage tank and cultivation bed
It is very important to choose the cultivation bed and storage tank that match each other. The cultivation bed and the liquid storage tank can be stacked together. The long side of the cultivation bed is slightly narrower than the storage tank to ensure that the bottom of the cultivation bed can be placed in the storage tank; and the wide side of the cultivation bed is slightly wider than the storage tank to ensure that the cultivation bed hangs on the storage tank without Fall in completely.
①Before painting, stick a piece of tape on an outer wall of the reservoir, from the top to the bottom vertically. Remove the tape after painting so that you can observe the water level in the future.
② Paint the outer walls of the storage tank and cultivation bed. The storage tank should be completely protected from light, as light will cause algae growth. The paint can be sprayed twice to ensure that the reservoir is opaque.
③After the paint is completely dried, remove the tape to observe the water level of the reservoir in the future.
④ Put on work gloves and goggles, and punch two 3.5cm diameter holes on a diagonal corner of the cultivation bed to install connecting pipes for water supply and drainage devices.
⑤ Use a deburring tool to polish the hole.
Install Irrigation System
⑥ Connect the water supply and drainage device to the cultivation bed. Install a connecting pipe with an inner diameter of 6 minutes on the drain pipe, and install a riser pipe on the connecting pipe.
⑦According to the distance between the water supply connecting pipe and the water pump, cut a 4-point black vinyl hose, and the water pump is located at the bottom of the liquid storage tank. The hose is better to be longer than the actual distance.
⑧ Connect one end of the hose to the connecting pipe of the water supply device, and connect the other end to the submersible pump.
⑨Fill the reservoir with water.
⑩Put the submersible pump at the bottom of the liquid storage tank, and then stack the cultivation bed above the liquid storage tank.
⑪Turn on the water pump and test the irrigation system. Check whether the drainage device is working properly and whether the drainage of the cultivation bed is good
⑫ Fill the cultivation bed with washed ceramsite. The height of the substrate should be higher than the drainage outlet to ensure that the water will not overflow the surface of the cultivation bed during irrigation. This kind of cultivation bed is shallower than the author expected, so the author removed the riser on the drain pipe so that the drain port can be completely covered by ceramsite.
⑬Put fertilizer into the storage tank, plant plants on the cultivation bed, and the whole cultivation bed system can operate normally.
Through the following steps, we can increase the viewing value of the system; of course, without them, the system can operate normally.
It is suggested that the ceramsite can be reused. After the plants are harvested, the remaining lines in the matrix should be removed in time, and the matrix should be disinfected regularly. You can use mild bleach, hydrogen peroxide, isopropanol, and hot water for disinfection. It is recommended to use boiling method for disinfection and reduce the use of chemical reagents, which is safe and environmentally friendly.
Install waterwheel (optional)
You can use Lego blocks or other small toys to decorate the vegetable garden. If you want to install a waterwheel in the vegetable garden, you need to lead a water pipe for the waterwheel from the main irrigation pipe. The installation method of the waterwheel is described in detail below.
⑭ Use an irrigation line puncher to make a small hole in the 4-point vinyl hose.
⑮Insert the 6mm diameter barb connector into this small hole.
⑯ Connect the 6mm diameter black vinyl hose to the barb connector.
⑰As shown in the figure, use a drill to drill a hole with a diameter of 6mm on the funnel of the waterwheel.
⑱Move the ceramsite substrate, fix the base of the waterwheel on the bottom of the cultivation bed, and place the waterwheel in the middle of the cultivation bed.
⑲Install a choke valve on the 6mm diameter black vinyl hose.
⑳ Fix the hose on the leg of the waterwheel with a self-locking cable tie.
㉑ Take a small 6mm diameter vinyl hose and connect it to the choke valve, and pass this part of the hose through the hole on the waterwheel funnel, as shown in Figure ㉑, and cut off the excess part.
㉒Turn on the water pump, adjust the choke valve until the waterwheel rotates, and check whether the entire irrigation system is working properly. Ensure that the water inlet of the water pump is fully open to obtain the maximum flow.
Tide training system
Tidal irrigation, because its irrigation method is similar to the rising and falling tides of seawater, this irrigation method is called tidal irrigation. The nutrient solution enters from the bottom of the cultivation substrate, relying on the capillary action of the substrate to supply water and nutrients to the plants, and then drain the nutrient solution. This cultivation system is named after this irrigation method. There are many similarities between the tidal irrigation cultivation system and the cultivation bed system mentioned in “3.7 bed cultivation system”. The main difference is that the tidal irrigation is to put the hydroponic substrate or rock wool block into the cultivation pot first, and then put the The pot is placed in the cultivation bed instead of directly putting the substrate into the cultivation bed.
Crop selection
The tidal irrigation cultivation system mentioned here can be slightly improved to meet the cultivation needs of different crops. From sprouts to large flowering and fruiting crops, all can be planted in this system. According to the different cultivated crops, adjust the irrigation frequency, flower pot size, substrate type and water injection height (drainage height).
Placement
Can be used in a variety of environments. If you use it outdoors, you need to be aware that rainwater will dilute the nutrient solution. This problem has also been mentioned in other cultivation systems.
Suitable places: indoor, outdoor or
Room size: all sizes
Growth substrate: perlite, ceramsite, rock wool and coconut chaff
Do you need power supply: Need
Crops: according to the size of the flower pot
Modification method
Only a slight modification of the system can meet different cultivation needs. The following briefly introduces several commonly used
Modification method.
(1) Replacing pots with larger pots is suitable for planting large-scale flowering and fruiting crops; smaller pots are suitable for planting leafy vegetables and herbs for easy management.
(2) Changing the material of the basin Plastic basin has many advantages, but there is a problem. During the irrigation process, some substrates will flow out of the drainage holes in the bottom of the basin, and these outflow substrates can easily block the drainage pipes. The non-woven cultivation bag is a good choice. It can basically prevent the substrate from flowing into the cultivation bed during the irrigation process, and this kind of non-woven bag helps the water to reach the root system quickly and drains more quickly during irrigation. Tidal irrigation basically does not damage the physical properties of the substrate, guarantees the demand for water and oxygen in the root system during the growth process, and avoids the impact of excessive watering.
Tidal irrigation is more common in vertical cultivars. Multi-layer cultivating beds can be placed on the shelf, and the liquid storage tank is placed at the bottom of the shelf. (3) There are many advantages to replacing different types of substrate ceramsite, which can avoid flooding and can be reused; coconut bran is also a good choice because it has good water holding capacity and can reduce the frequency of irrigation. Other common substrates such as perlite, peat and rock wool can also be used in this system. One thing to pay attention to when choosing a substrate: When using a substrate with a finer texture, such as coconut chaff, grass charcoal, and small pearls, it is recommended to use a non-woven bag to prevent the substrate from flowing out of the drainage holes in the bottom of the basin and causing the drainage system to block.
(4) Adjust the size of the cultivation bed. The prefabricated cultivation bed has a variety of sizes to choose from, ranging from 30 to 120 cm in width and 60 to 360 cm in length. The DIY cultivation bed can be large or small, depending on personal preferences and needs. The material of the cultivation bed can be cement tank, plastic container or wooden container with plastic lining. No matter what kind of cultivation bed you choose, you must pay attention to it: the selected cultivation bed can be equipped with water supply devices (flush or nearly flush with the bottom of the cultivation bed) and drainage devices (higher than the bottom of the cultivation bed, and the general height is the height of the pot used. 1/3).
Coconut silk blankets can combine the two systems of tidal irrigation and cultivation beds. Coconut silk blanket allows plant roots to grow throughout the cultivation bed, while the plants grow in their respective pots. Coconut silk blanket can keep the surface of the cultivation bed clean and reduce the growth of algae. However, it also increased costs accordingly.
Materials and tools
Reservoir and cultivation bed
35cm long x 28cm wide x 8cm high plastic box (used as a cultivation bed) 1
37cm long x 27cm wide x 23cm high plastic box (15L, used as a liquid storage tank) 1
Scotch tape
Spray paint
Irrigation system
1 black vinyl hose with a length of 30 cm and an inner diameter of 8 mm
Length 10cm, inner diameter 4 points black vinyl
1 hose